

We’ve been building up to this moment, and here it is…time to start actually making stuff with crochet!
Maybe that’s too over the top because we’re really only going to talk about the most basic of crochet things this week. In fact, you can’t really use what I’m going to talk about to make anything on its own. Except perhaps, a long snake! But they form the basis for almost every other project you will tackle, so we do need to talk about them.
Slip Knot
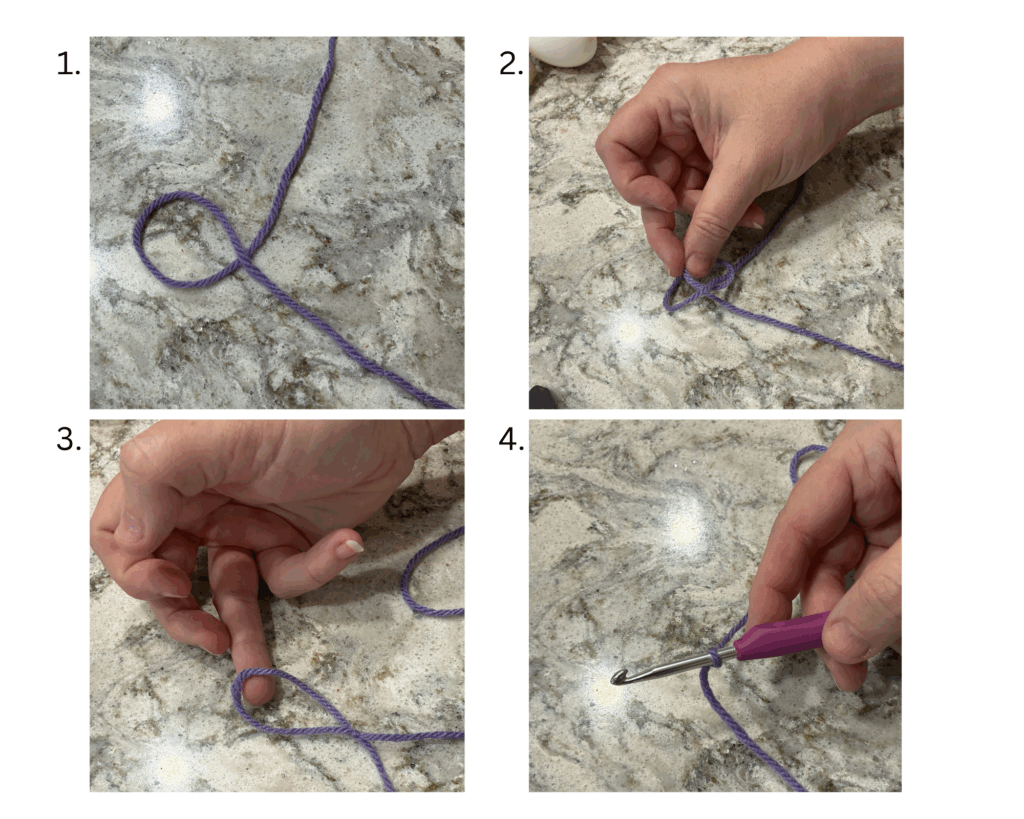
The first step is to get the yarn onto your hook in a way so that it stays. You can just make a regular loop and knot it off, but we want this loop to be adjustable. Depending on our project, we may need to increase or decrease the size of this initial loop, so having it adjustable is a must. To do this, we are going to create a slip knot.
I know, it sounds fancy. It’s not, I promise.
To start, take your yarn tail and make a loop, with one end crossing over the other. Leave a fairly long tail, as we will weave this in at the end of the project to secure it. Reach through this loop, and grab a pinch of yarn on the non-tail end, the one that is going to the yarn skein, and pull this through the loop. Once it is solidly through, pull up on it at the same time as you are pulling down on the tail end of the yarn until the knot is tight. You can then pull on the yarn end of the knot to increase or decrease the size of the loop until it is appropriately sized for your hook. I like to use my finger to make this initial knot, but you can use your hook. Whatever works best for you. If you pull both ends of the yarn at the same time, the knot comes undone and you just have the yarn string you started with.
Chain Stitch
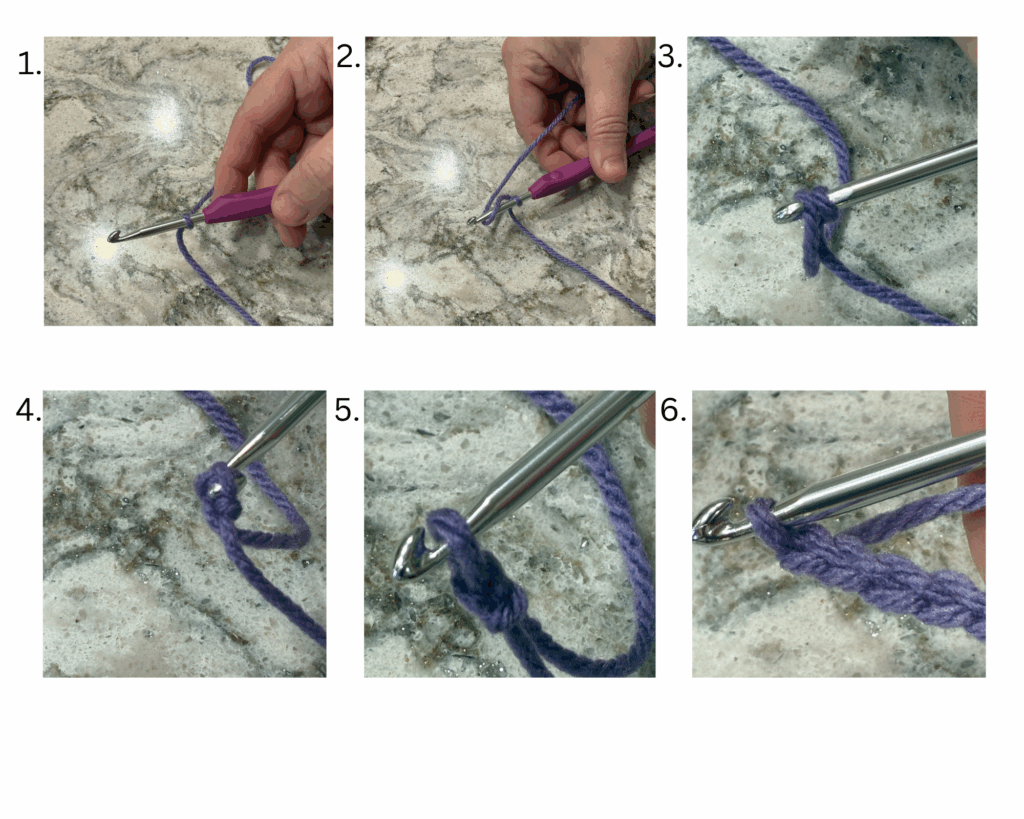
Great, now we have a loop of yarn on your hook! Let’s do something with it.
Using your chosen grip, or even just winging it at this point, take hold of the yarn end of the two tails of yarn hanging from the hook. Without moving the hook or the knotted loop, bring that over the hook to make an additional yarn strand that lies over the hook body. Slide this new yarn strand forward on the hook so that it catches in the hook portion. Without letting this strand move, slide the hook through the previous loop that was on the hook. You should now have a new, single loop on your hook. This is the chain stitch. You will do this over and over again until you have a length of chains. Most patterns start with this stitch, so it’s important to get it down pat. Make sure not to pull the loops too tight, because we will be going back and working into the chain in later lessons.
That feels like it was a lot, right? Practice makes perfect, so if it doesn’t make sense right now, that’s ok. It takes some time and practice to get the hang of it, so keep practicing these two steps until you feel comfortable. If you are wanting to crochet, you’ll need to make these stitches under your belt.